Thursday, 11 November 2010

Mr Fishie

Just a small update, in terms of lighting I've made some adjustments but the main point of this blog is that I thought it was worth noting the newest addition to my Sunken Temple scene.
Meet Mr Fishie:


I’d been considering for a while adding a fish to my scene but doubted very much I could manage it. Yet lo and behold here he is. Mr Fishie is able to swim a pre-set path around the whole room weaving in and out of obstacles as you can see here illustrated by the green line:


That’s Mr Fishie there in the bottom right (Purple thing).
I’ve also managed to attach a wake emitter to him so that a ripple effect will follow him as he moves around. (Purple box)
Mr Fishie is loosely based upon a fighter fish as suggested by a friend. Though I say loosely as my modelling skills are the best and I also did not invest too much time in modelling him in detail as I want to keep the scene as low poly as I possibly can where necessary, so as to reduce render times.

(Picture from http://www.cs.washington.edu/homes/lachesis/images/classes/vision_final/images/fighterFishMedly.bmp)
As you can also see from the top down I’ve been doing quite a bit of set dressing adding shells and such to much of the scene, making it feel that little bit fuller and more natural.
Next I plan to add some various different types of coral and weed, some of it animated if I can.
And so to finish here’s a very short rough video where you can see Mr Fishie in action, sort of.

Also since watching this video I’ve edited the way Mr Fishie moves so it looks a little more fish like and less ‘tail wagging’ like.

Wednesday, 10 November 2010

The Most Frustrating Day Ever!

Well as you can probably guess, yesterday I had an exceedingly frustrating day!
Having made quite a good deal of progress on my Sunken Temple I decided it was high time I did a practice render of the lighting sequence to see where I was at in terms of how it looked and what needed altering.
Recently I acquired the newest version of Autodest Maya, 2011, on a student licence from the Autodest website. But on going to my render settings I found, to my dismay, no sign of the settings to render straight to video; and so I was forced to render out all 5000 frames individually.
PLEASE IF ANYONE KNOWS WHY THIS IS AND HOW TO FIX IT LET ME KNOW!!!!!!
Thankfully as this was merely a test run I rendered them in the lowest possible settings that I could use and still vaguely see the scene in. 160x120 20dpi I believe it was. Patheticly bad quality I know but I didnt need it to be good quality, just quick. This alone took 3 long hours to achieve but the worst was still to come.
For on rendering out each individual frame I realised that no program knew I had would render a video easily with 5000 imges. I tried Photoshop/Imageready, Premiere pro, and Flash but none of these would open 5000 files at once unsurprisingly. So then using Premiere I tried making it in little chunks, only to find it too nearly an hour to put together 200 frames and each frame lasted a lengthy 5 seconds!
Whilst this doesn’t sound much it’s out of the question for an animation frame which needs to be as close to 0 as possible. Then there was the task of pasting them together and trying to speed them up effectively.
After over 5 long hours of attempting this it was pointed out to me by my boyfriend that I did in fact have Windows Live Movie Maker (I didn’t realise they’d changed the name) which easily took all 5000 frames, let me adjust the time of all of the frames in one go instead of individually, and add music as if it were nothing....
To say the least I almost cried...
In the end I got the 3 and ½ min video up and running in under an hour, allowing me to spot where changes needed to be made and check my water effects so that I can finally continue with my work without guessing everything.
One thing this has taught me is that I will definitely need at LEAST a week, probably 2 to be safe, to render out my final piece in high quality, once more set dressing/animated bits/effects/camera movements are added.
All in all an utterly frustrating day, but with a happy ending.

And now I leave you with my terrible quality video which is so far still rather boring but should give you an idea of what I've been up to.

Wednesday, 3 November 2010

Marionettes and Sea Shells

Well it’s been a good while now since my last update but I’ve been hard at work with a few different things.

Sunken Temple
Firstly an update on my Sunken temple. I’ve been making quite a few alterations to the original design of this piece, only additive so far. As well as this I’ve started adding textures to bits of it and bump mapping a lot of things which I rather proud of only recently learning how to do this.
I’ve also taken quite a bit of inspiration from this photo which my sister recently took whilst on holiday in Italy:

Seeing this exquisite room made entirely of shells really inspired me to go all out in putting some more detail into my model so I am adding a little at a time more and more detail (and shells) as I go as well as generally shaping the room more and more and adding more points of interest.


Essays
Aside from working on this model I have also completed my Literature and Contextual Essays which I shall admit I strongly disliked doing.
Not because I’m against doing research, nor writing. Quite the opposite as I had already spent a large amount of time doing both and compiling my findings before these essays anyways. However I found for the amount of references collected (10 books 10 journals 10 websites and 10 of another variety) the expected essays were pitifully short and it barely seemed worth the effort to do so much research for what is essentially a page of writing where one barely has room to write a thing...
The actual essay writing pert was rather easy, in fact the hardest part was trying to condense it down as much as physically possible.
But by comparison finding that amount of references was EXTREMELY hard indeed!!! Just try searching for books or journals on ‘Video Games Lighting’ and you’ll see what I mean....
And I’m not the only one who’s had problems with this one. Everyone I’ve spoken to seems to have had real problems collecting references too.... It’s a tad annoying I’ll admit as I haven’t really learnt anything new that my own private research hadn’t taught me already. It just seemed to take up a lot of time I COULD have spent much more productively.
However as it is a necessary part of the course I suppose there is nothing to be done about it.
Anyways that’s all done and dusted now thank god so there’s a huge weight off my shoulders.

Looking forwards
As well as my current work I’ve also been looking more into what I’m going to do with my final piece this year. I like to be prepared.
The whole battle cutscene idea has been thrown out of the window just due to the scale being to huge. I always was overenthusiastic.
Instead I have found two great versions of one piece of music which I have merged together to form a nice transition. The piece being the classic Dance of the Sugar Plum Fairystarting off with the classic version and transitioning to a much darker version. Both pieces were created by the talented Kevin MacLeod. Who’s beautiful music really inspired me and can be found here .
With this music I intend to create an animated short ballet piece featuring two characters entitled ‘The Spider and the Marionette’. I have a general overview of the piece in mind and my dancer friend will be helping me choreograph the piece. So as a small teaser here are two designs of the Marionette character.

Tuesday, 12 October 2010

Windows Cats and Ocean ruins


Long time no blog! (2 weeks nearly! )
After some more work on my previous stained glass window model I have finally produced a few more lighting variations for this set to finish my experiments.


I’m particularly proud of that last one in the up-lit green! Rather spooky if I do say so myself.
So where have I gone since then?
Well I’m looking further into examples of films, games and plays where mood lighting and camera have been used to great effect.


(Example screenshots taken from CATS the Musical, no copyright infringement intended.)
It’s strange but since starting this project I cannot seem to watch a film now without inspecting the lights.
I even found myself examining how the light from a bedroom on my house’s landing was casting yellow light onto the wall while the dim light from outside left blue shadows and thinking to myself how very remarkable it was.
So that research is ongoing. At the same time I have been looking at modelling a nice environment in which to showcase all the mood setting effects I learn this semester.
The environment I have chosen to create is based on this image I drew a while back:
So far trying to recreate this environment I have learned a good deal, in particular about ocean shaders and particle effects, and I hope to discover a great deal more too if possible.
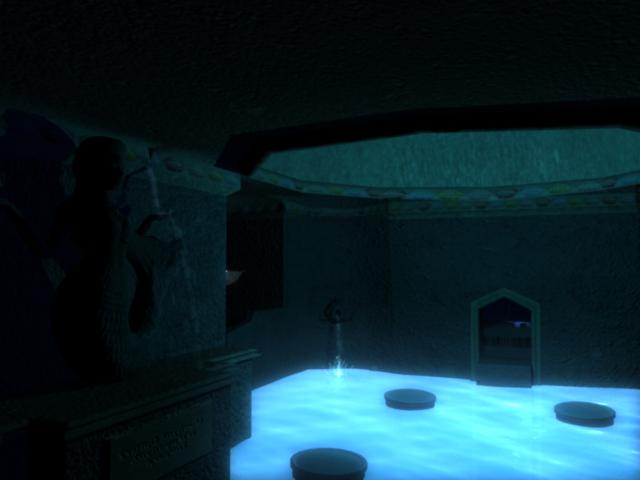
And so on that happy note I shall conclude today’s blog with a few in-progress shots of the ‘sunken temple’ environment:


Friday, 1 October 2010

Rainbow Windows

Okay time again for another update.
So since my last update I’ve been working more on setting up a nice mini set to practice my lighting skills and such.
So far (with a lot of studying of online tutorials) I’ve finished and textured the room, added my very first bump map (on the floor) and created a kick ass stained glass lighting effect:


And now with my set all set up and working I can experiment with some of the tecniques I mentioned in my previous blog.
Here's a simple example of how changing the colour of the lighting alone affects the image hugely: